

Number: The secret patterns behind string art
View Sequence overviewAn algorithm is a precise sequence of instructions that a computer can follow to produce a predictable result.
Testing code against a prediction is a reliable way to find and fix errors.
Whole class
The secret patterns behind string art Slides
Each student
Completed Quadrant 1 Student sheet from Task 1
Device with access to Scratch (if devices are limited, the activity works well with one device per pair)
Task
Remind students that in the last lesson they drew 11 lines by hand and recorded the start and end coordinates of these lines.
Display Slide 12 of The secret patterns behind string art Slides, showing the completed quadrant 1 image. Ask: We drew this by hand. How could we get a computer to draw it for us?
Students will likely suggest giving the computer the coordinates. Tell students: that is exactly what Scratch lets us do.
Show students Scratch, and ask them to access it on their own devices. Introduce the Scratch blocks students will need to use: When green flag clicked, Go to x: ( ) y: ( ), Pen down, Pen up, and Erase all.
| Block | Name | What it does | Where to find it |
|---|---|---|---|
 | When flag clicked | Runs the script from the beginning | Events category |
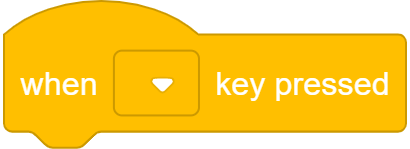 | When [ ] key pressed | Runs the script when the selected key is pressed. Click the dropdown to choose any key on the keyboard. | Events category |
 | Go to x: ( ) y: ( ) | Moves the sprite to that coordinate position. | Motion category |
 | Pen down | Starts drawing a line as the sprite moves | Pen category; must be added via Extensions |
 | Pen up | Stops drawing | Pen category; must be added via Extensions |
 | Erase all | Clears any pen drawings from the canvas | Pen category; must be added via Extensions |
The Pen category is not visible by default. They must be added via the Extensions button at the bottom left of the block palette. Select Pen and the blocks will appear as a new category in the palette.
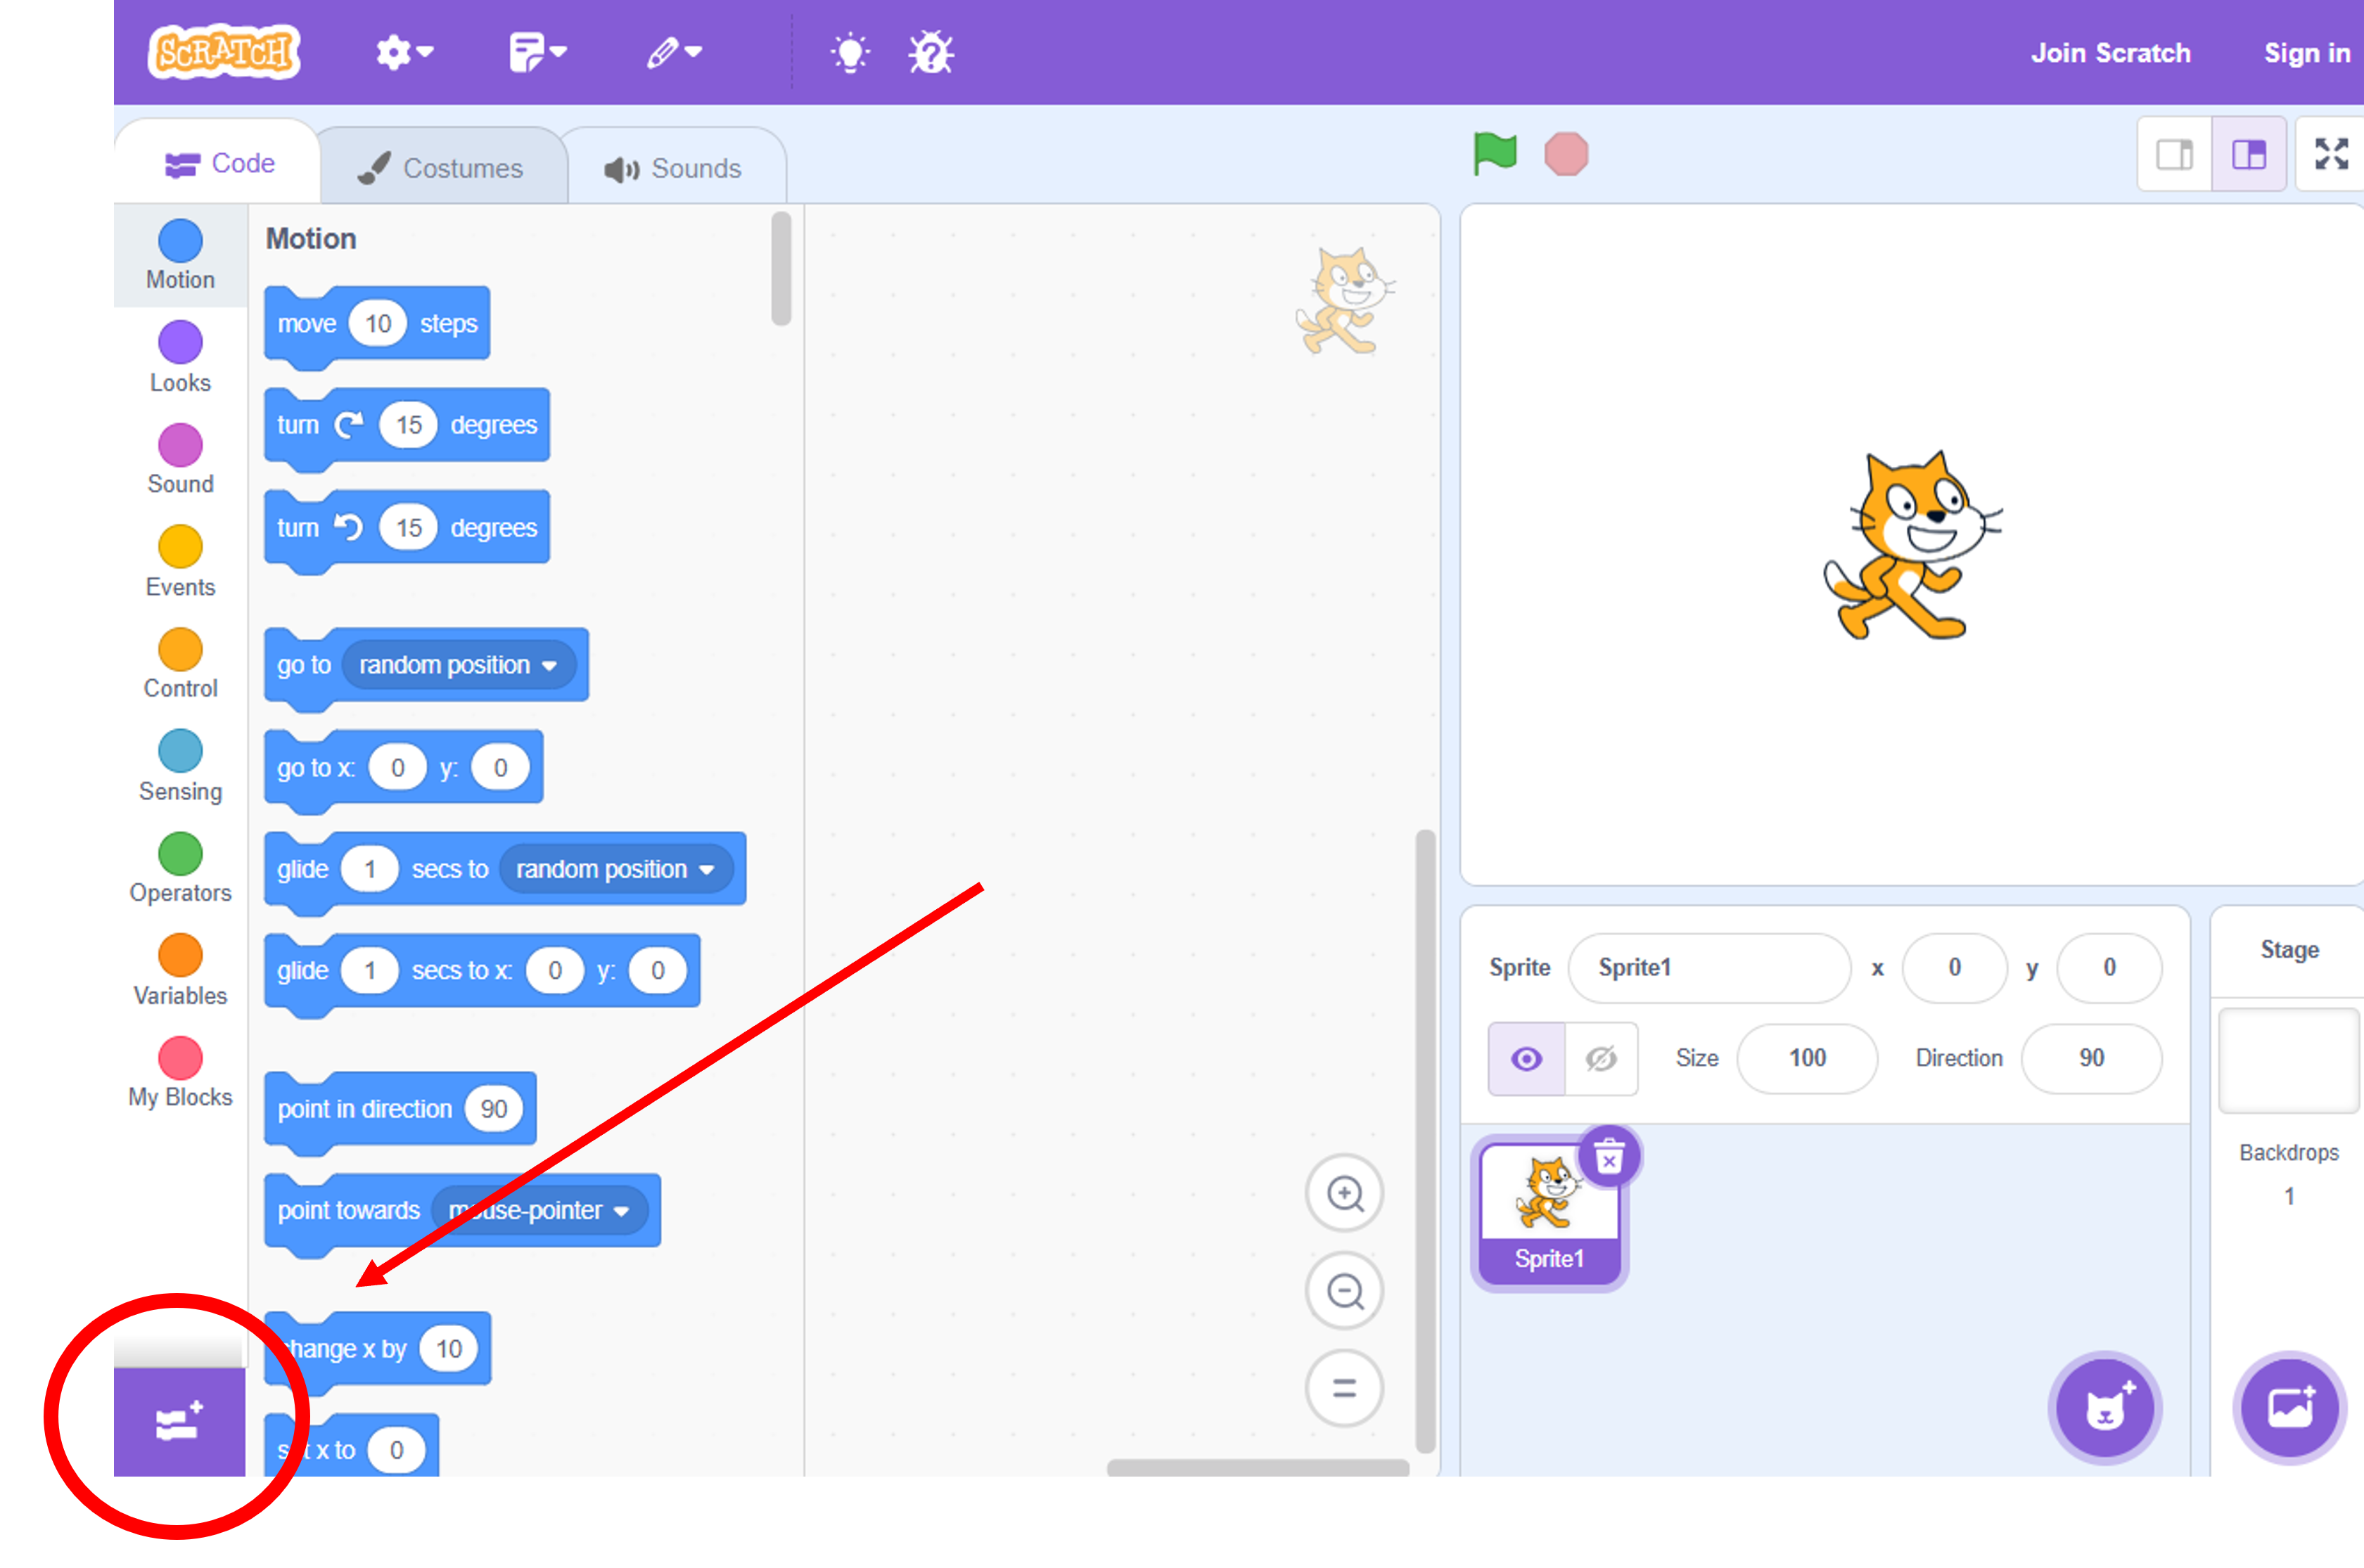
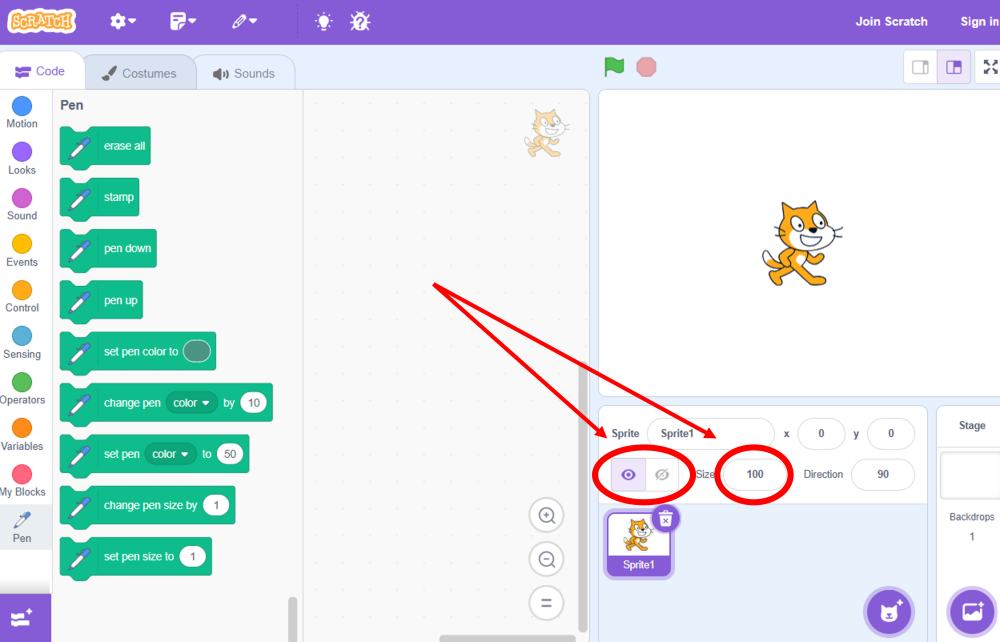
It is also worth reducing the size of the sprite so that students can see their lines more easily. This can be done by lowering the size value in the sprite panel below the stage, or clicking the eye icon to hide it.
Step 1: Model one line together
Show students how to build the following sequence one block at a time, with students following on their own computers.
- When flag clicked – starts the script.
- Go to x: 100 y: 0 – moves the sprite to the start point.
- Pen down – starts drawing.
- Go to x: 0 y: 0 – draws to the end point.
- Pen up – stops drawing.
Before running the code, say: I predict this line will go from $\mathit{(100, 0)}$ to $\mathit{(0, 0)}$. Let’s check.
Run the code (by clicking the green flag above the stage) and confirm the output matches your prediction.
Each time students run their code, any pen marks from the previous attempt will remain on screen unless the canvas is cleared first. This makes it very hard to tell whether a fix has worked.
One way to erase the screen is to create a separate when space key pressed script that resets everything automatically. This script sits alongside the main code and contains just two blocks:
- Erase all — clears any pen marks from the canvas.
- Go to x: 0 y: 0 — returns the sprite to the origin.
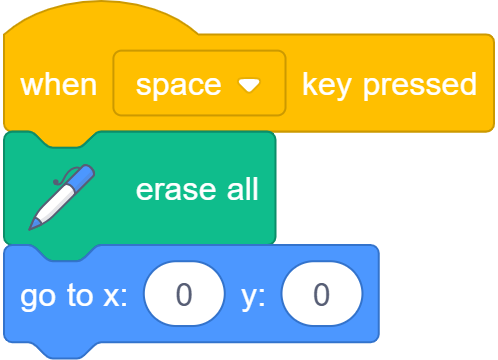
Pressing the spacebar will now clear the canvas and return the sprite to the centre, ready for the next attempt.
Step 2: Gradual release
Tell students you will now draw the second line together. Place the go to x: ( ) y: ( ), pen down, and pen up blocks in the correct order on the board, leaving the coordinate values empty. Ask students what the coordinates should be. If students are unsure, suggest they refer back to the table on their Quadrant 1 Student sheet.
Step 3: Independent practice
Ask students to create the code for the third line on their own, using their Quadrant 1 Student sheet as a reference for the coordinate values if needed.
Example code for the first three lines
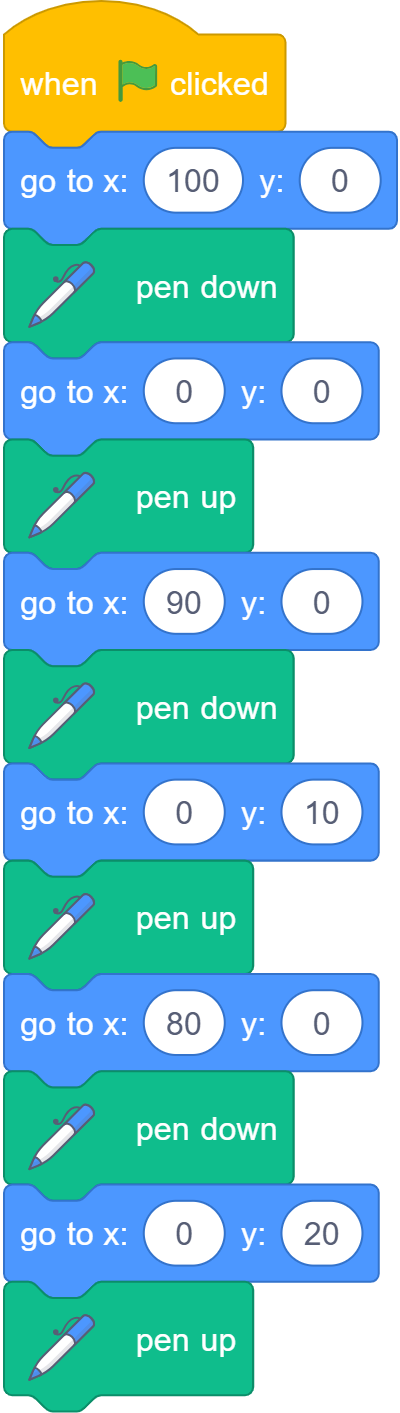
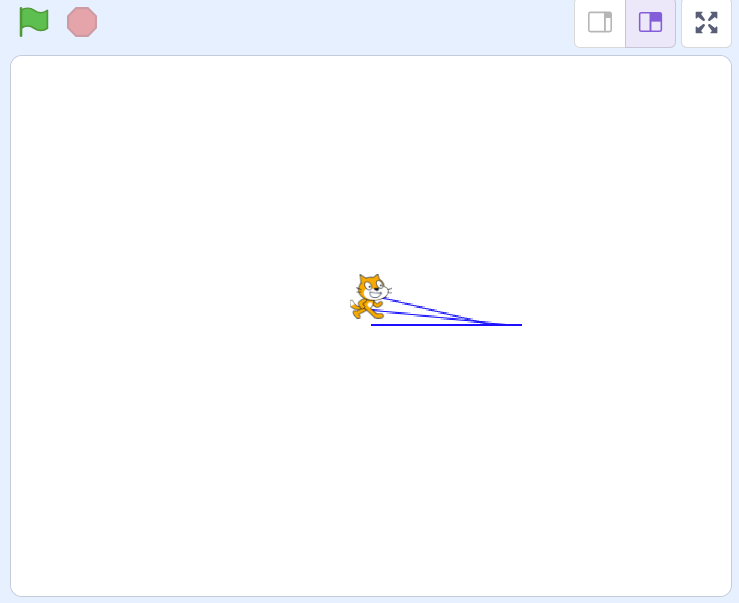
Getting started with Scratch

Scratch is available at scratch.mit.edu and works in any modern browser without installation. Students can use it without creating an account, but an account allows them to save their work. Creating a class account or having students use the same shared project is also an option.
If you have not used Scratch before, the video Beginners’ guide to scratch (VERY simple) covers the basics and will get you oriented in about ten minutes.
If devices are limited, the activity works well with one device per pair. One student reads the coordinates from the table, the other enters them into Scratch. Roles can alternate as students move through the steps.
Scratch is available at scratch.mit.edu and works in any modern browser without installation. Students can use it without creating an account, but an account allows them to save their work. Creating a class account or having students use the same shared project is also an option.
If you have not used Scratch before, the video Beginners’ guide to scratch (VERY simple) covers the basics and will get you oriented in about ten minutes.
If devices are limited, the activity works well with one device per pair. One student reads the coordinates from the table, the other enters them into Scratch. Roles can alternate as students move through the steps.
Teaching Scratch step-by-step
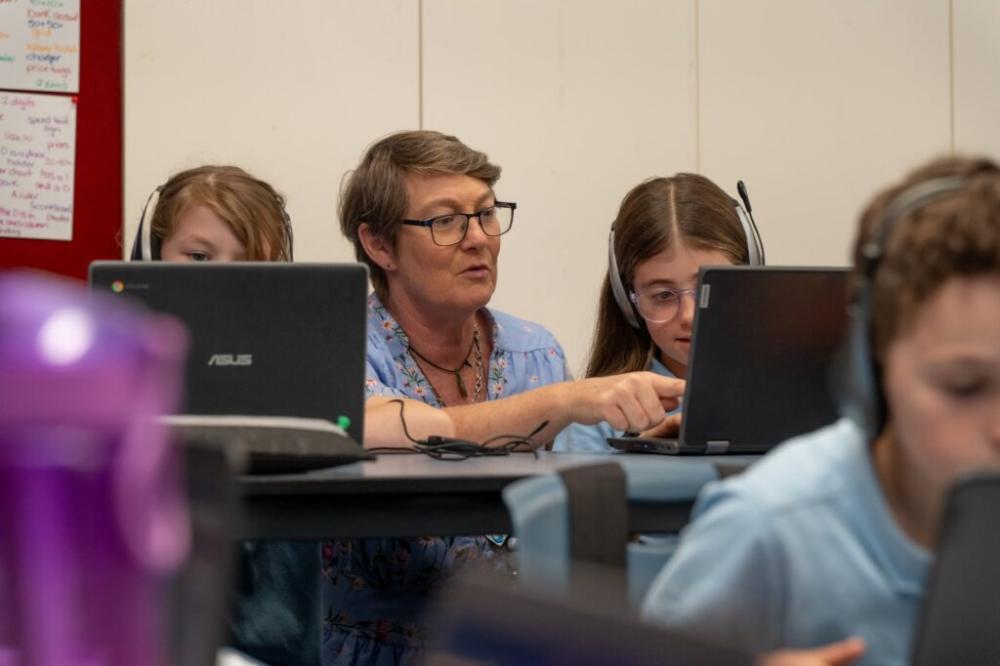
Students are likely to vary in their Scratch experience, and it is worth introducing the environment deliberately rather than assuming familiarity. The coding tasks in this sequence are not complicated, but students who lose their footing early tend to stay lost.
Display your own Scratch editor on the board and build the script live with the class, one block at a time. Avoid showing a completed script upfront: when students can see the whole thing, they tend to copy without understanding what each block does or why it is there.
As you add each block, show students where to find it in the palette. Blocks are colour-coded by category, and calling out the colour is a simple way to help students locate what they need quickly. Rather than saying “add a go to block”, say “add the blue go to block in the Motion category.” This small shift reduces time spent searching and keeps the class moving together.
Pause after each block and check that students are keeping up before moving on. It is worth moving more slowly than feels necessary, particularly in the first session. Students’ attention will be moving back and forth between the board and their own screen, which means instructions are easily missed. Repeating each step at least two to three times before moving on gives students a second chance to catch what they need without having to ask.
Students are likely to vary in their Scratch experience, and it is worth introducing the environment deliberately rather than assuming familiarity. The coding tasks in this sequence are not complicated, but students who lose their footing early tend to stay lost.
Display your own Scratch editor on the board and build the script live with the class, one block at a time. Avoid showing a completed script upfront: when students can see the whole thing, they tend to copy without understanding what each block does or why it is there.
As you add each block, show students where to find it in the palette. Blocks are colour-coded by category, and calling out the colour is a simple way to help students locate what they need quickly. Rather than saying “add a go to block”, say “add the blue go to block in the Motion category.” This small shift reduces time spent searching and keeps the class moving together.
Pause after each block and check that students are keeping up before moving on. It is worth moving more slowly than feels necessary, particularly in the first session. Students’ attention will be moving back and forth between the board and their own screen, which means instructions are easily missed. Repeating each step at least two to three times before moving on gives students a second chance to catch what they need without having to ask.
Say: Before we go any further, I want to show you something.
Build the code for the fourth line on the board, deliberately omitting the pen down block.
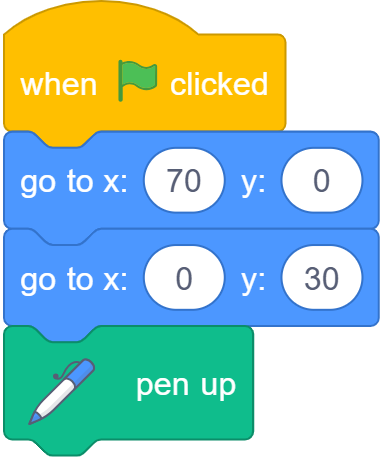
Before running it, say: I predict this line will appear going from here to here. Let’s check.
Run the code. Nothing appears on the stage. React naturally: Huh. That is not what I expected. I predicted a line would appear, but nothing did. Something in my code does not match my prediction.
Pause and ask: Can anyone spot what has gone wrong? Have a look at the blocks I have used.
Give students a moment to look, then take suggestions. Take all responses seriously, including incorrect ones. If a student suggests something that does not fix the problem, make that change to the code on the board, run it, and note aloud: Interesting. Let’s try that. It’s closer, but something is still not right. What else might need to change? This models something important: a suggestion can be partially correct, and debugging often involves finding and fixing more than one problem at a time.
Keep taking suggestions until the missing pen down is identified.
Then ask: Where should it go? Why does it need to be there and not somewhere else?
Once students have agreed on the fix, make the correction and run the code again. Confirm it matches the prediction. Then say: That is the process for any time the code does not do what you expected. Compare what you see on the screen to what you predicted. Find where they differ, fix it by changing one thing at a time, and check again. You just did that.
The following three errors are worth having ready to model. Each one is common and gives students a clear example of the predict/code/check process in action.
| Error to model | What students see | What to say out loud |
|---|---|---|
| The $x$ and $y$ values of the end point coordinate entered in the wrong order | The line ends in the wrong place | I predicted the line would end here. It ended there instead. Let me check my end point coordinates. I have written (50, 0) but I wanted (0, 50). I have mixed up the order. |
| Pen down missing | Nothing appears on the stage | I predicted there would be a line. Nothing happened. Let me check whether the sprite is actually drawing. I can see pen down is missing from my code. |
| Erase all missing | Old lines remain on stage from a previous run | I can see lines from my last attempt still on the screen. That means my stage is not resetting. Let me check whether erase all is in my reset script. |
Supporting students to debug their own code
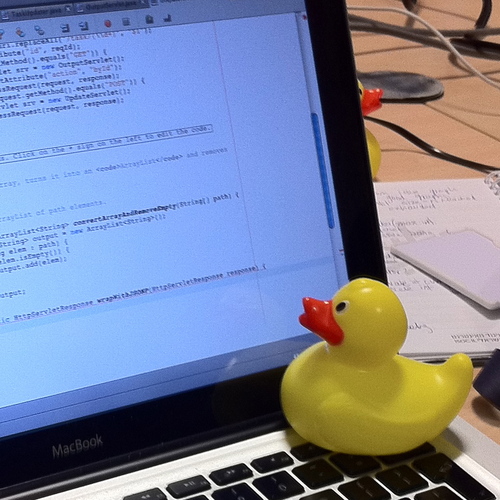
The predict/code/check routine gives students a more systematic alternative: if the output does not match the prediction, the error is somewhere between the two. The job is to narrow down where.
Modelling this process explicitly before students encounter their own errors gives them a method to reach for when something goes wrong. When circulating during independent work, rather than pointing to an error, ask students to retrace the cycle:
- What did you predict?
- What did you get?
- Where is the first place they differ?
A few strategies that help students locate errors systematically:
- Read the code, not the intention. Students often read their code as they meant to write it rather than as it is. Asking them to point to each block and say out loud what it does can surface mismatches between intention and code. This is a well-known debugging technique in the programming world, sometimes called rubber duck debugging: the idea is that explaining your code out loud to anyone, or anything (such as a rubber duck), forces you to slow down and articulate exactly what each line does, which often reveals the error without any outside help.
- Build and test as you go. Rather than writing the code for all 11 lines and running it at the end, students should write the code for one line, test it, confirm it works, and then move on to the next. This way, if something goes wrong, the error is almost certainly in the most recent block added, which is much easier to find than an error buried somewhere in code for all 11 lines.
- Check one thing at a time. Students who change multiple things at once cannot tell which change fixed the problem. Encourage them to test one idea before moving to the next.
- Work from the beginning. Errors are easier to find when students trace through their code from the first block rather than scanning for something that looks wrong. Ask: where does the sprite start? What is the first thing it does? Does that match what you see?
- Use the stage as evidence. The stage tells students exactly what the code did. If a line appears in the wrong place, the start or end coordinates are wrong. If nothing appears, the pen is not down. Encouraging students to read the stage actively, rather than just noticing that something is wrong, helps them connect the output to a specific part of the code.
The predict/code/check routine gives students a more systematic alternative: if the output does not match the prediction, the error is somewhere between the two. The job is to narrow down where.
Modelling this process explicitly before students encounter their own errors gives them a method to reach for when something goes wrong. When circulating during independent work, rather than pointing to an error, ask students to retrace the cycle:
- What did you predict?
- What did you get?
- Where is the first place they differ?
A few strategies that help students locate errors systematically:
- Read the code, not the intention. Students often read their code as they meant to write it rather than as it is. Asking them to point to each block and say out loud what it does can surface mismatches between intention and code. This is a well-known debugging technique in the programming world, sometimes called rubber duck debugging: the idea is that explaining your code out loud to anyone, or anything (such as a rubber duck), forces you to slow down and articulate exactly what each line does, which often reveals the error without any outside help.
- Build and test as you go. Rather than writing the code for all 11 lines and running it at the end, students should write the code for one line, test it, confirm it works, and then move on to the next. This way, if something goes wrong, the error is almost certainly in the most recent block added, which is much easier to find than an error buried somewhere in code for all 11 lines.
- Check one thing at a time. Students who change multiple things at once cannot tell which change fixed the problem. Encourage them to test one idea before moving to the next.
- Work from the beginning. Errors are easier to find when students trace through their code from the first block rather than scanning for something that looks wrong. Ask: where does the sprite start? What is the first thing it does? Does that match what you see?
- Use the stage as evidence. The stage tells students exactly what the code did. If a line appears in the wrong place, the start or end coordinates are wrong. If nothing appears, the pen is not down. Encouraging students to read the stage actively, rather than just noticing that something is wrong, helps them connect the output to a specific part of the code.
Say: Your job is to draw all the lines from the Quadrant 1 Student sheet in Scratch. For each line, predict where it will appear, code it, then check.
Students work through the 11 lines one at a time, using their coordinate table from the Quadrant 1 Student sheet as a reference if needed. For each line the routine is: predict, code, check.
If students are finding it difficult to follow what the sprite is doing, consider replacing the go to x: ( ) y: ( ) block with the glide ( ) secs to x: ( ) y: ( ) block. Unlike the go to x: ( ) y: ( ) block, which moves the sprite instantly, the glide ( ) secs to x: ( ) y: ( ) block animates the movement over a set number of seconds, making it easier to see which point the sprite is travelling to and where each line begins and ends.
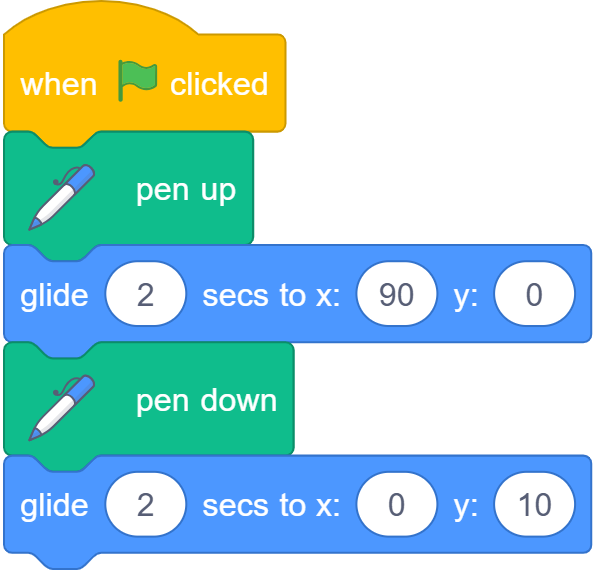
A glide time of 0.5 to 1 second is usually enough to make the movement visible without slowing the class down too much.
As students work, circulate and prompt the predict/code/check habit rather than fixing errors directly. Ask: What did you predict? What did you get? Where is the first place they differ?
| If a student... | Try... |
|---|---|
| ...has a line appeared in the wrong place | Which line looks wrong? Point to it. Now find those coordinates in your code. Check the start point first. |
| ...has nothing appear on the stage | When does the sprite start drawing? Show me that block in your code. |
| ...has old lines remaining on the stage | Is your stage showing just the lines from this run? Where is your erase all block? |
| ...finishes early | Can you change the colour of each line? See if you can find the block that controls pen colour and experiment with it. |
Using duplication to support pattern recognition
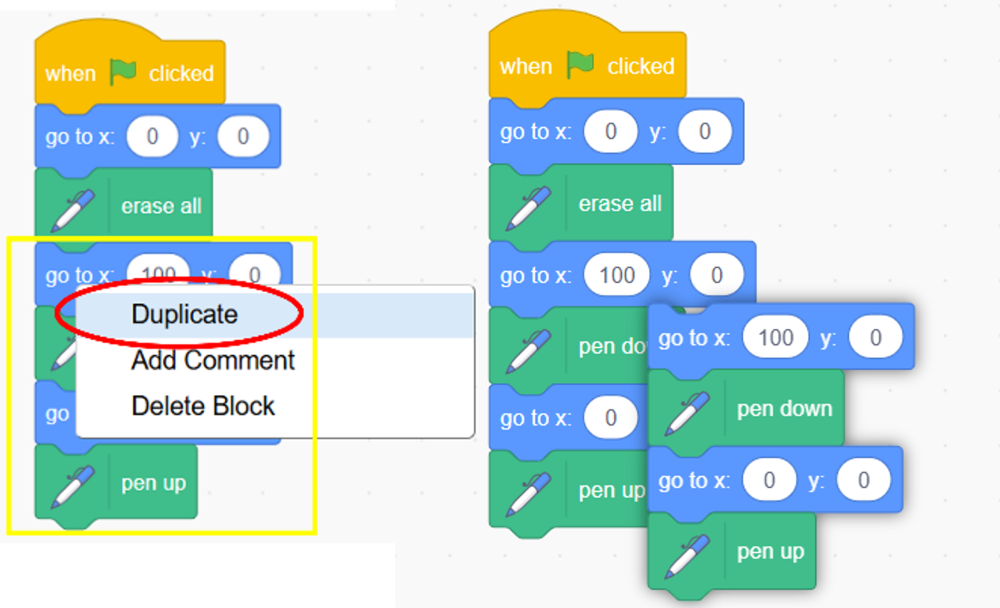
Scratch’s duplication feature lets you right-click any block and select Duplicate, copying that block and everything beneath it. It's a shortcut for reusing a sequence of code rather than rebuilding it, useful whenever the same instructions repeat with only small changes.
For students, this is also a chance to notice something. To see why duplication is worth using, they first have to spot that the code for drawing one line keeps reappearing, with only the coordinates changing. That's pattern recognition: picking out what stays the same and what varies.
It’s worth letting students find the feature themselves and work out when it’s worth using, rather than explaining the benefit upfront, since that noticing is what matters. Deciding what to copy and what to change uses the same reasoning that Task 3 will later formalise into a loop.
Scratch’s duplication feature lets you right-click any block and select Duplicate, copying that block and everything beneath it. It's a shortcut for reusing a sequence of code rather than rebuilding it, useful whenever the same instructions repeat with only small changes.
For students, this is also a chance to notice something. To see why duplication is worth using, they first have to spot that the code for drawing one line keeps reappearing, with only the coordinates changing. That's pattern recognition: picking out what stays the same and what varies.
It’s worth letting students find the feature themselves and work out when it’s worth using, rather than explaining the benefit upfront, since that noticing is what matters. Deciding what to copy and what to change uses the same reasoning that Task 3 will later formalise into a loop.
Bring the class together with a completed image coded in Scratch on the board. Ask: What did you notice about writing that code?
Take a few responses. Then display Slide 13 which shows the code for three lines side by side. Ask: Look at these three blocks of code. What is the same across all of them?
Draw out that the structure is identical every time: the same sequence of blocks in the same order.
Then ask: What is different?
Students should identify that only two values change: the $x$-coordinate of the start point and the $y$-coordinate of the end point.
Then ask: How do those values change? Is it random, or is there a pattern?
Draw out that the values change in a predictable way each time.
Once the repetition and the pattern are established, ask: How many lines did we draw altogether?
Give students a moment to count, either by looking at their Quadrant 1 Student sheet or their Scratch project.
Establish that there are 11 lines, and leave it there. That number will come up again next task.