

Number: The secret patterns behind string art
View Sequence overviewThe signs of the two numbers in a coordinate pair determine which quadrant the point belongs to.
Points on the axes and at the origin have at least one coordinate equal to zero.
An algorithm built for one purpose can often be reused, with small modifications, for a similar purpose.
Whole class
The secret patterns behind string art Slides
Each student
Making art Student sheet
Device with access to Scratch
Task
Display the predictions and votes recorded on the board at the end of Task 4. Read through the predictions. Ask: Before we test these, does anyone want to change their vote? Has anything we did last lesson made you think differently?
Take a few responses. Then tell students: Today we are going to put our predictions to the test.
Tell students their task is to complete the full string art image by drawing quadrants 3 and 4 in Scratch. How they get there is up to them: they might adapt their existing loops, write new code from scratch, or draw a few lines by hand first to work out the coordinates before touching Scratch.
Suggest going back to pen and paper. Ask students to draw straight lines for quadrant 3 on a blank grid and record the coordinates in a table. Even two or three lines might be enough to start seeing what is changing and what is staying the same. From there, students can use the same reasoning they applied in Task 4 to work out what needs to change in the loop.
As students work, return to the predictions on the board. Ask students who finish early to check their result against the class predictions.
Ask:
- Which predictions were correct?
- Was there more than one correct answer?
- Could there be more than one way to describe the change that works?
Display Slide 33 of The secret patterns behind string art Slides which shows a blank Cartesian plane.
Work through the following questions. For each question, take responses and use the table below to guide the discussion.
| Ask... | Students might say... | Try... |
|---|---|---|
| What do all the points in quadrant 1 have in common? | Both numbers are positive | Can you point to a point in quadrant 1 on the image and show me that's true? |
| If both the $x$ and $y$ values are negative, which quadrant must the point be in? | Quadrant 3 | How do you know? Can you convince someone who isn't sure? |
| If a coordinate has one positive and one negative number, which quadrant is it in? | Quadrant 2 or quadrant 4 only | What if the negative number was the $x$ value instead of the $y$ value? Would that change anything? |
| What else do you need to know to be certain which quadrant a point is in? | Which number is negative | Can you give me an example that shows why that matters? |
| What is always true about points on the $x$-axis? | The $y$ value is always 0 | Can you find a point on the $x$-axis on the image and check that’s true? |
| What is always true about points on the $y$-axis? | The $x$ value is always 0 | What about the origin? Does that fit this rule too? |
| What are the coordinates of the origin? | $(0, 0)$ | Why are both values 0? What does that tell us about where the origin sits? |
Work toward a shared summary:
| Location | What is true about the coordinates |
|---|---|
| Quadrant 1 | Both $x$ and $y$ are positive. |
| Quadrant 2 | $x$ is negative, $y$ is positive. |
| Quadrant 3 | Both $x$ and $y$ are negative. |
| Quadrant 4 | $x$ is positive, $y$ is negative. |
| On the $x$-axis | $y$ is always 0. |
| On the $y$-axis | $x$ is always 0. |
| At the origin | Both $x$ and $y$ are 0. |
Display Slide 34 showing a range of string art designs. Each one was made the same way as the class’s string art, but with something changed: different reference lines, the same $x$- and $y$-axes with different step size between points, or one axis paired with a new reference line.
Provide students with the Making art Student sheet, which shows a blank grid with several reference lines already drawn: the coordinate axes, the two diagonal lines running corner to corner (the lines $y=x$ and $y=-x$), and the four straight sides of a square centred on the origin. Each line can be used as its own reference line in the same way the axes have been used previously. Students can choose to copy one of the inspiration images, or invent their own.
The worksheet provides a blank table for students to record coordinates as they go. Encourage students to use the same predict-before-draw routine from Task 1: predict the next coordinate pair before drawing each line, then check. Students who want to recreate one of the inspiration images will need to work out which reference lines were used and where the points were placed.
Slide 35 shows two examples of how the worksheet could be used to design art.
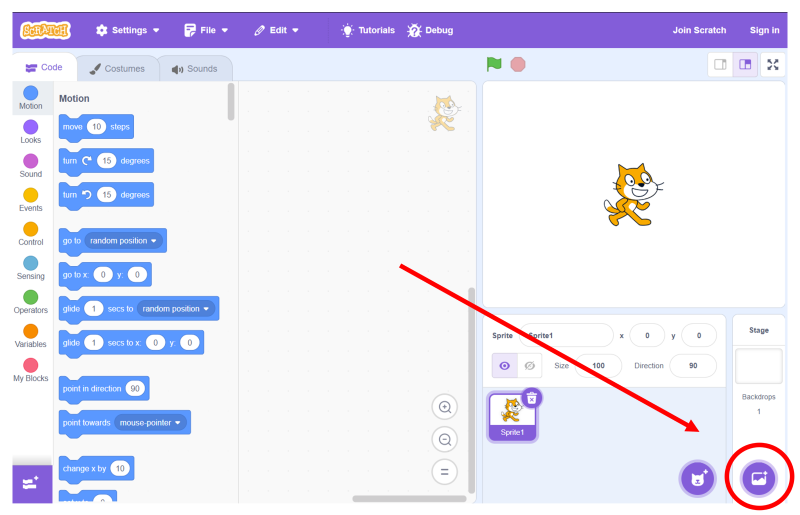
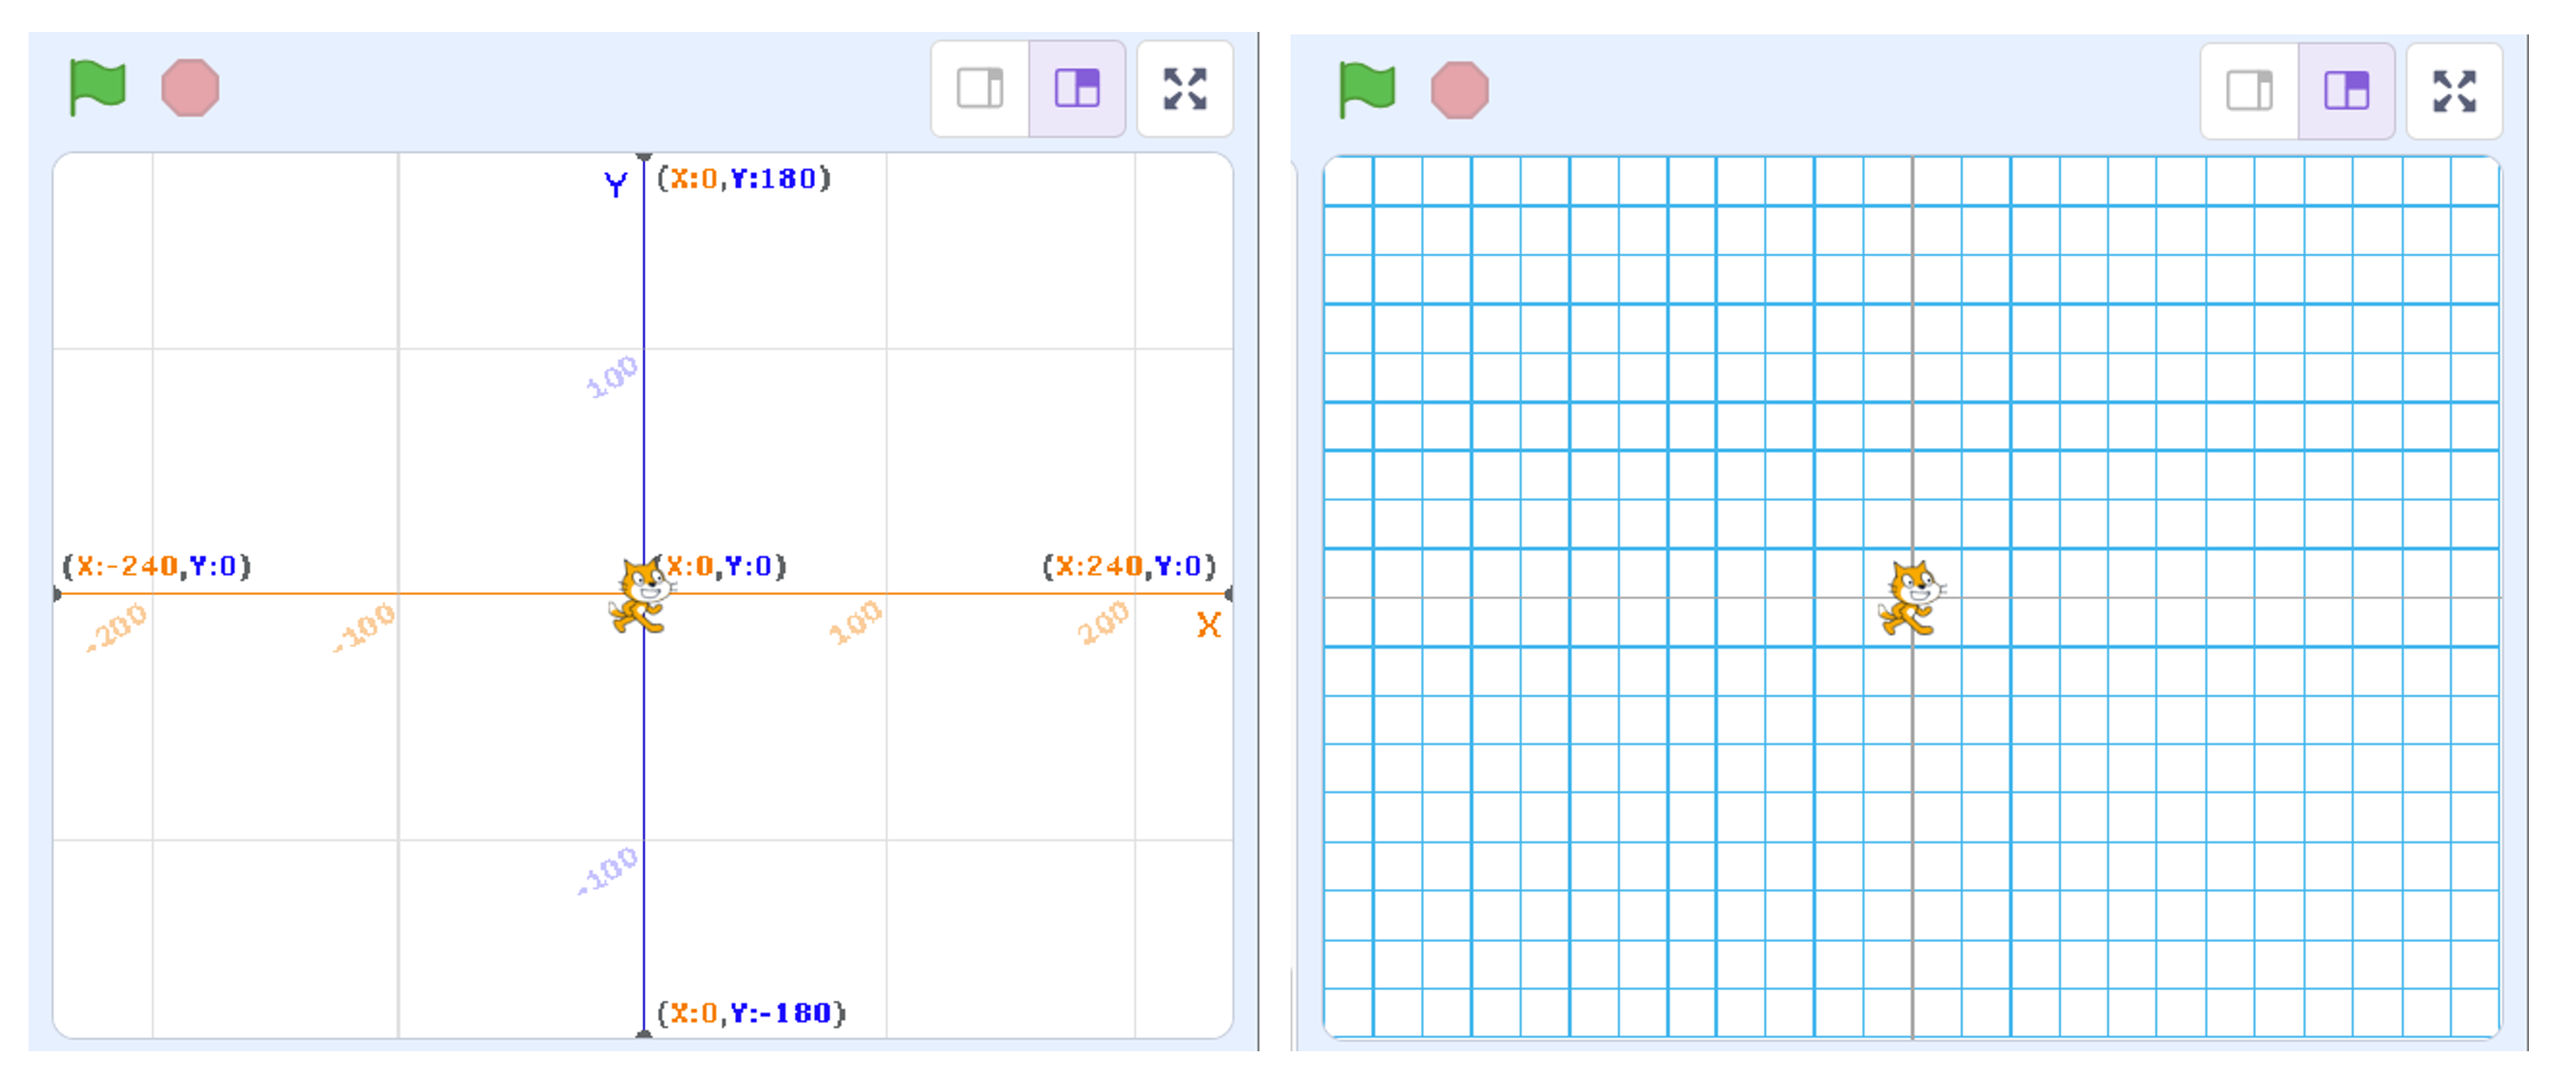
Students who are finding it difficult to visualise where their lines are appearing may find it helpful to add a background image to the Scratch stage showing a Cartesian plane with the $x$- and $y$-axes labelled. This gives a visual reference for the coordinate system without affecting the code.
To add a background in Scratch, click the Choose a Backdrop button at the bottom right of the screen.
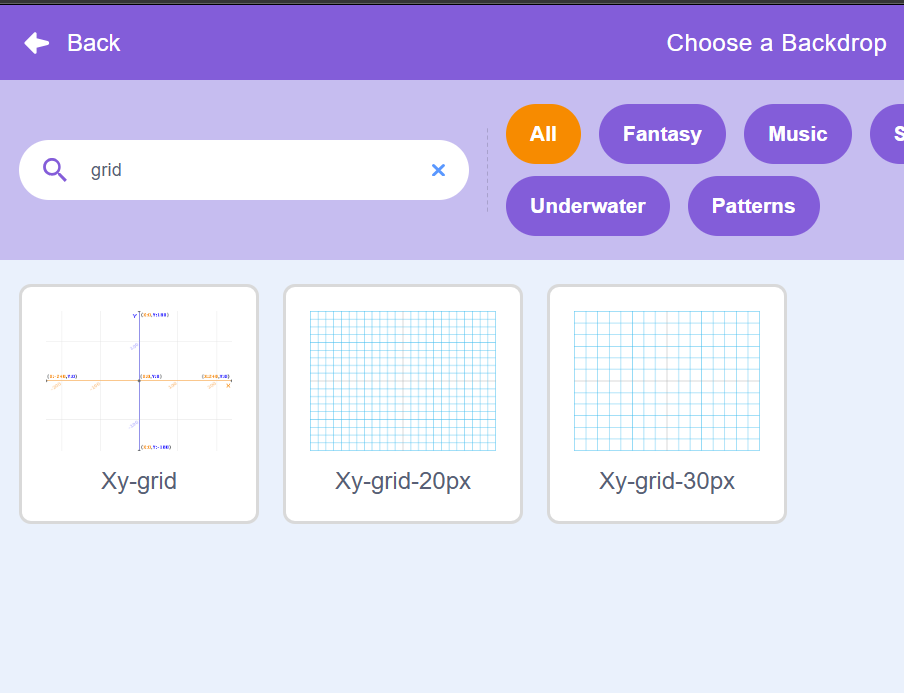
A simple grid or axis image can be found by searching for “grid”.
The two images below show examples of background grids added to the stage.
Reverse engineering as problem posing
Asking students to create their own pictures can be approached in two ways, and both are mathematically valuable.
Open exploration, where students decide for themselves which reference lines to use, where to place their points, and what design to aim for, works best for students who are confident enough with the tool to make deliberate mathematical decisions. Without that fluency, open exploration can slide into random guess and check: changing values until something interesting appears, without any insight into why it looks the way it does. If a student does stumble on something unexpected and visually striking, that is worth pursuing, but insist that they spend time explaining why that image occurred. What in the rule produced that result? Could they have predicted it? That shift from “look what I made” to “here is why this happened” is where the mathematical thinking lives.
In a reverse engineering approach, students start from an inspiration image and work backwards to figure out how it was made. Which reference lines were used? Where were the points placed? How many lines are there, and what does that tell us about the step size? This approach gives students a concrete target, which can make it easier to get started. It also requires a different kind of mathematical reasoning: reconstructing a method from evidence rather than applying a known method to a new example.
Neither approach is better than the other. The inspiration images on the slide can be used as a scaffold for students who want a starting point, or ignored entirely by students who prefer to explore freely. Some students may start with an inspiration image and then deviate from it as their own ideas emerge. All of these are productive ways to engage with the task.
Asking students to create their own pictures can be approached in two ways, and both are mathematically valuable.
Open exploration, where students decide for themselves which reference lines to use, where to place their points, and what design to aim for, works best for students who are confident enough with the tool to make deliberate mathematical decisions. Without that fluency, open exploration can slide into random guess and check: changing values until something interesting appears, without any insight into why it looks the way it does. If a student does stumble on something unexpected and visually striking, that is worth pursuing, but insist that they spend time explaining why that image occurred. What in the rule produced that result? Could they have predicted it? That shift from “look what I made” to “here is why this happened” is where the mathematical thinking lives.
In a reverse engineering approach, students start from an inspiration image and work backwards to figure out how it was made. Which reference lines were used? Where were the points placed? How many lines are there, and what does that tell us about the step size? This approach gives students a concrete target, which can make it easier to get started. It also requires a different kind of mathematical reasoning: reconstructing a method from evidence rather than applying a known method to a new example.
Neither approach is better than the other. The inspiration images on the slide can be used as a scaffold for students who want a starting point, or ignored entirely by students who prefer to explore freely. Some students may start with an inspiration image and then deviate from it as their own ideas emerge. All of these are productive ways to engage with the task.
Display students’ finished designs around the room or share them on a screen. Give students time to walk around and look at what others have made.
Ask: Pick a design that isn’t yours. Can you work out which reference lines were used? Where do you think the points were placed? Can you describe the rule that made it, the same way we described ours: what changes each time, and by how much?
For designs that used an unusual step size or an invented reference line, invite the student who made it to explain their choice: What made you pick that reference line? What happened when you tried it?
Say: As a class, we all started with the same underlying rule: change x by 10 each time, and change y by 10 each time, whether that meant adding or subtracting depended on which quadrant we were in, but the rule itself never changed. But look at what we could make once we started tweaking that rule, different reference lines, different step sizes, different starting points. One rule, endless pictures.
Gallery walk
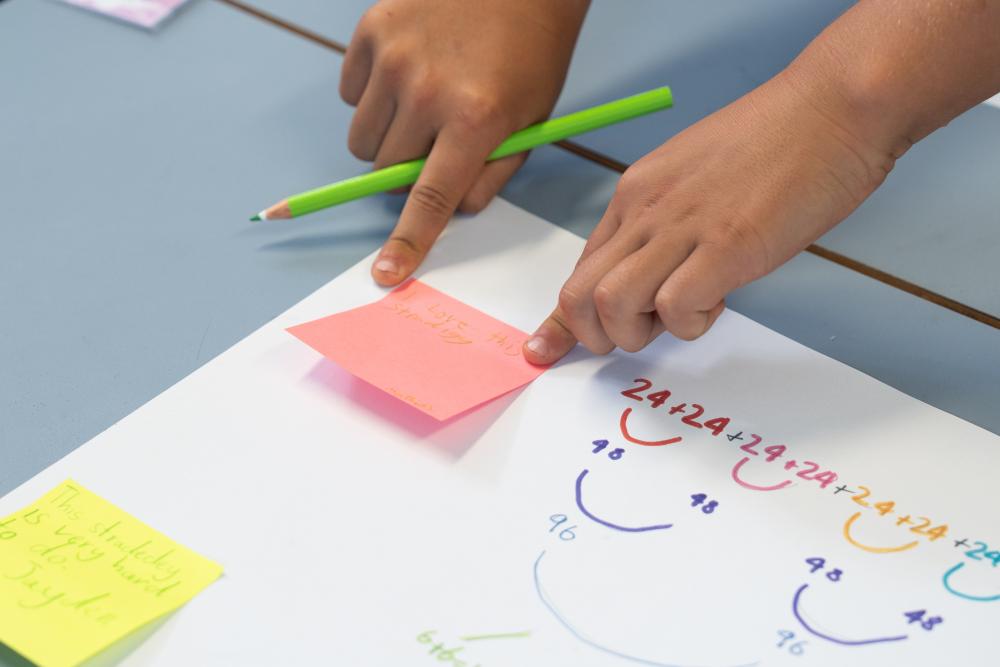
A gallery walk is a simple structure: students display their work, then move around the room looking at what others have made, with a specific task to do while they look, in this case, working out which reference lines and step size produced a design that isn't theirs.
This gives every student something to do, rather than watching one design be explained at the front at a time, and it is a stronger test of understanding than designing your own picture alone: recognising the same rule at work in someone else's design, especially one built from a different reference line, shows the pattern has actually been understood rather than just applied once. Circulating during the walk also gives the teacher a low-pressure way to hear students reasoning about the rule out loud.
A gallery walk is a simple structure: students display their work, then move around the room looking at what others have made, with a specific task to do while they look, in this case, working out which reference lines and step size produced a design that isn't theirs.
This gives every student something to do, rather than watching one design be explained at the front at a time, and it is a stronger test of understanding than designing your own picture alone: recognising the same rule at work in someone else's design, especially one built from a different reference line, shows the pattern has actually been understood rather than just applied once. Circulating during the walk also gives the teacher a low-pressure way to hear students reasoning about the rule out loud.